Thursday, March 24, 2011

Seed Beaded Sunflower Earring Tutorial


I recently realized that this tutorial
was lost when I closed my Ebay store,
so I am going to repost for everyone that is interested.

Sunflower Earring Tutorial:
You will need to be familiar with brick stitch.
Supplies:
11/0 and 8/0 seed beads (in colors of your choice)
8mm bead (2)
ear wires (2)
beading needle
beading threadSunflower: 11
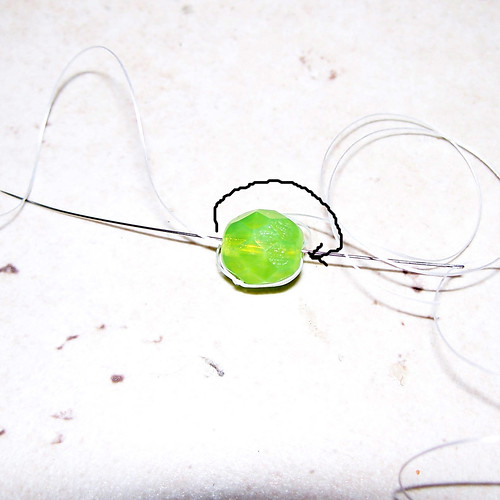
1. String the 8mm bead.
It will be the center of the flower.
Sunflower: 1
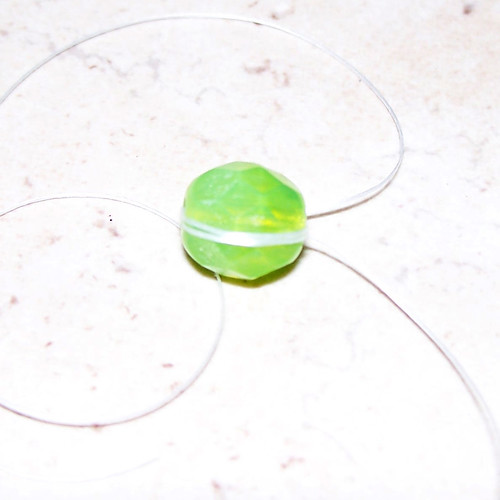
2. You will want to thread around the bead
on both sides. This is where you will later
attach the seed beads using a brick stitch.
Sunflower: 2
3. I do it a few times to make a stronger
base to stitch the beads onto.
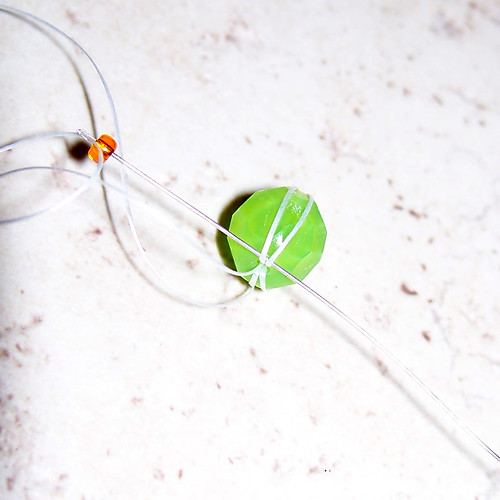
Sunflower: 3
4. Another picture showing what it should look like.
You should have this on both sides of the bead.
Sunflower: 4
5. Time to stitch on the beads.
Use brick stitch to attach the 11/0 seed beads,
sewing on one next to the other.
Sunflower: 5
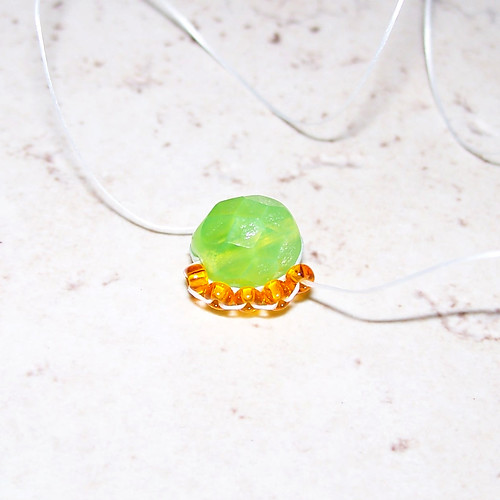
6. I was able to fit 7 on each side.
Sunflower: 6
7. Here is a picture with 14 11/0 seed beads
added around the center bead.
If you need to add more or less, you can. You can even try this using larger or smaller center beads. I suggest that you make sure to end up with a even number of beads.
Sunflower: 7
8. Stitch on the next row using 8/0 seed beads using brick stitch.
Sunflower: 8
9. Now, time for the petals!
I used 10 11/0 seed beads for each petal.
Come up out of one bead, string 10 seed beads and weave down through the next. Come up through the next bead, string 10 seed beads and weave down through the next....etc...etc... until you have 7 petals or have done it around the entire bead.
Sunflower: 9
10. Next we will do an alternate layer of petals. Using the same technique stated in number 9 above, string petals in alternating bead pairs. You do not want the beads to be on top of each other, but staggered.
Sunflower: 10
11. The last step is to attach the ear wire to the top of the flower. Attach it wherever you think will make the earring hang best.
Finished!Sunflower: 11
Hope that you all enjoy making lots of flower earrings!
As with all of my tutorials, feel free to email me or comment with any questions that you have.

Like this pattern?
Check out my book of 15 patterns!

Monday, March 21, 2011

A Rockstar Birthday Party

Here are some photos
from Charles' Rockstar Birthday Party:

We used the ticket invitations.
I had them printed at Costco on 4x6 sized photo paper and cut them out.

I set up a table with bandanas, sunglasses, and t-shirts (to decorate).

I also cut out cardboard guitars for them to color.

We also had lots of tattoos to apply!
The goodie bags...


Microphone cupcakes
With these, I baked the cupcakes in the cones
(unlike these ones).
They weren't as cute as the others, but were close enough!

There was a lot of junk food!

Some fun games...

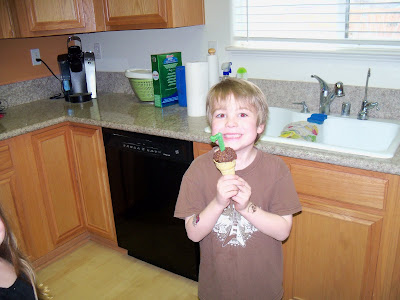
A very happy birthday-boy!

A crazy big sister...
who provided much entertainment!

The birthday-boy enjoying one of his gifts.

Overall, I think everyone had fun...
and Charles had a blast
(which is what's most important)!

Thursday, March 17, 2011

Wednesday, March 16, 2011

Pin the Sunglasses on the Rockstar

We saw a game idea of "Pin the Sunglasses on the Rockstar" and thought it would be fun to play at Charles' birthday party.
Unfortunately, the only posters at Walmart were of Justin Bieber or the guy from Twilight (Ramona and Sienna would have been okay with those, but not Charles!)...
So we were forced to make our own rockstar poster.

I found a graphic of a rockstar online and stuck Charles' face on it!

I enlarged it, cut it out, and glued it to a piece of white poster board.
I will use the sunglasses shape (shown below) to cut out a bunch of glasses out of black construction paper or card stock.

Silly Sienna trying on the sunglasses;)
This game was really easy to make, and I'm sure a similar one can be made for almost any party theme.

Friday, March 4, 2011

New Ornament Added to My Etsy Shop

I just added a CUSTOM diamond ring ornament to my Etsy shop. It would be great customized as an engagement or wedding ornament!

Thanks to one of my wonderful customers for the idea!

Thursday, March 3, 2011

Great Gift Idea for Kids!

I was reading Made
(one of the many inspiring craft blogs that I read...you should check it out if you haven't already!),
and I stumbled upon this other wonderful, inspiring blog called Saltwater Kids.
She has this super awesome fort building kit/tutorial that I had to share!
It would make such a wonderful gift for kids of all ages! I don't know a kid that doesn't like building forts!
I think this idea could even be simplified more by buying a tote bag, etc...
And if you don't want to make your own...
You can enter her giveaway here:

photo from http://www.saltwater-kids.com/

Tuesday, March 1, 2011

I "heart" This Idea!

One of the best parts about making custom cake toppers
is hearing all of the unique ideas
that my customers come up with.
I love the idea of the cake topper that I made below!
Instead of putting a flower between the love birds as usual,
they wanted the internet symbol used for heart.
I "heart" this idea!