
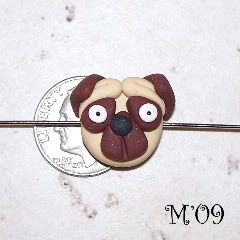
Polymer clay pug dog bead tutorial:

Above photo shows amounts of clay that will be used.
You will need beige, brown, black and white colored polymer clay (tiny glass holeless beads are optional). Also, I reinforce each added piece of clay with liquid polymer clay.

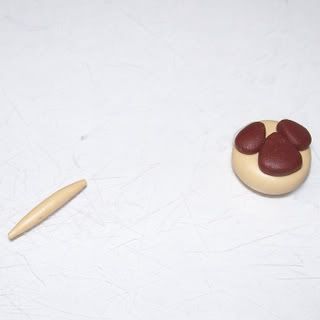
The larges ball of beige clay is flattened. This will be the head.

Next grab one of the larger balls of brown clay. Shape into a triangle. This will be the snout.
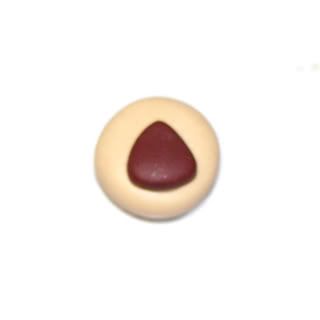
Place snout on bottom, center of the beige head piece.
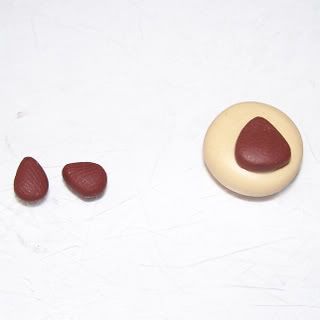
Next, shape two of the smaller (about half the snout amount) balls of brown clay into teardrop shapes. These will be the eye spots.
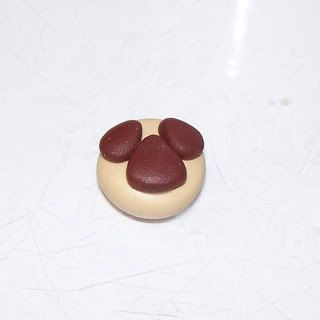
Place with pointed side up on both sides of the top of the snout.
Now, we will make the eyebrows. Take the small balls of beige (the same amount as the eye spots), and roll into tiny snakes, tapering at the ends.
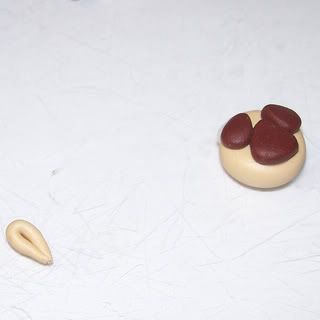
Fold snakes in half pinching ends lightly together.

Place the eyebrows on the top part of the head over the eye spots with rounded ends touching in the center.

Take two more of the larger balls of brown (same amount as snout). Shape into triangles. These will be the ears.
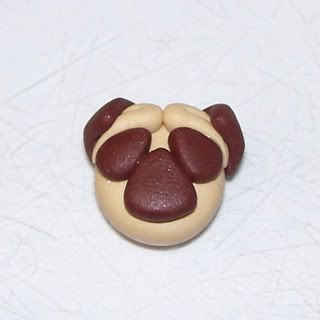
Place on top of head, but a little off to the sides.

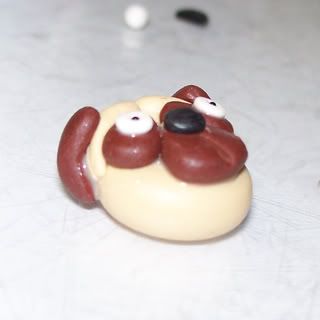
Side view of ears.

Back view of ears.
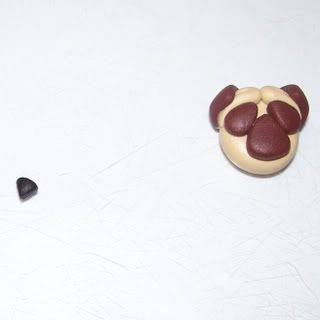
Now, the nose. Grab the small ball of black (about a quarter the size of the eye spots). Roll into a ball, slightly oval shaped.

Place nose on the top part of the snout.

Roll tiny balls of white (about half the size of nose) to make the eye balls. Place on the center of each brown eye spot and flatten.
Add a tiny dot of black clay or tiny black holeless beads to the center of each white eyeball.
Take a needle tool or needle and press into the center, bottom half of the snout.
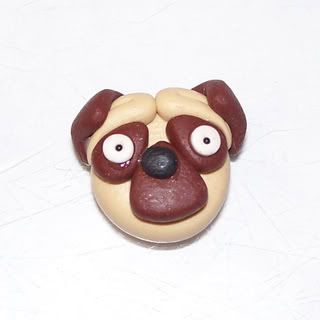
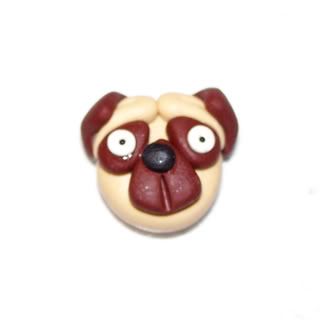
Side view of finished bead.
Poke hole in desired position.
Bake according to directions on clay package.


© 2009 threemoonbabies / Marjorie Dalgarn, All rights reserved.You may use this tutorial to make jewelry for sale. If you do so, please link back to Marjorie Dalgarn ( http://3moonbabies.etsy.com or http://livingwiththreemoonbabies.blogspot.com) in the item description.
Giveaway!!!:
If you would like the pug charm pictured below to be yours,
leave a comment in this post with your name and a way to contact you if you win. I will randomly draw a name on next Saturday, March 7..
Good Luck!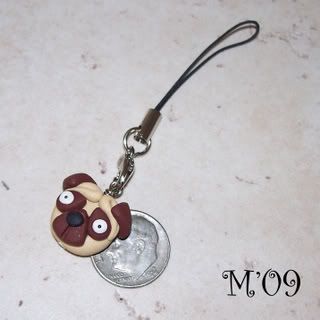
21 comments:
you make it look so easy I would love to win him con5459(at)gmail(dot)com
What a cute little pug face! Thanks so much for sharing your creative process with all of us. I'd love to win the pug charm to give it to my sister - she has a new pug baby 4 months old.
MidwestieLady (on etsy)
revlindah(at)tampabay(dot)rr(dot)com
SO CUTE! I love it so much! Great work!
Thanks for the giveaway!
Cheers,
Melody
mel_88_88 at hotmail dot com
Im so utterly amazed by the process! Im glad you showed us how it's made. :)
Crystal(manhattandolls[at]gmail[dot]com)
That's adorable. He's got the worried pug look down pat.
Thanks so much for showing us how to do that - amazing pics and very nice puppy!! Would love to win.
Audrey
http://audreyscountrycrafts.etsy.com
That is so cool, you make it look so effortless. I love it.
hollyzhobby.etsy.com
thank you for the opportunity to win this cute little fellow
That is so cute! I wish I was that talented but my work would never look so good :-)
vmlay@artsci.wustl.edu
He's adorable! Thank you so much for the tutorial.
He's adorable! He reminds me so much of my own pug "Mogwai" He isnt with us any more, but he is remembered fondly and often. I would love to have this charming fellow. Good luck to everyone!
Thanks for the giveaway!
Kimspam66(at)yahoo(dot)com
Oh, the pug is adorable. Thank you so much.
This pug is so cute and i love the tutorial. Thanks a lot!
Thanks for showing us how to make this cute little pug face. If I win I would gift this to my niece Joanna, she has a cute little pug dog.
Thanks for sharing
I'd love to learn to do that. Very cute!
nfmgirl AT gmail DOT com
My nieghbor across the street has a pug named cookie I would so love to win this for her
how cute!! my best friend has pugs she would love this.
=) melanie
melanieadey at hotmail dot com
oh I love that....
well you can find me thru my blog I guess and on etsy I am 2kute.
Hope I win. beautiful work.
Your tutorial is great-thanks so much for sharing. The pug is super cute! Great work!
livingglassart@gmail.com
My daughter is waiting for her own PUG, I wonder if this would buy me some time? :)
Giveaway is now closed. Thanks to all who entered and for all of your sweet comments:)
Post a Comment